 ultimate-guide
Ensuring Quality in Home Remodeling Projects
Last Updated: October 23, 2026
Quick Summary
Quality in home remodeling comes from inspecting work, materials, and installations at defined stages so defects are caught before they get buried. Quality is not a final inspection but a habit repeated at every phase, from contractor vetting through closeout. The cost of rework almost always exceeds the cost of the inspection that would have prevented it.
- Verify contractor licensing through your state or local licensing board and confirm insurance directly with the insurer.
- Require every change order in writing with price and schedule impact before work proceeds.
- Rough-in inspections must pass before insulation and drywall, with a typical inspector window of 24-72 hours.
- Photograph every wall cavity before drywall goes up to document plumbing and wiring locations.
- Never let a contractor skip a required inspection or permit to save time.
Table of Contents
- Why Quality Control Decides Whether Your Home Remodeling Pays Off
- How to Choose a Remodeling Contractor You Can Actually Trust
- The Home Remodeling Contract Checklist That Prevents Disputes
- Your Home Renovation Timeline, Phase by Phase
- A Home Remodeling Quality Checklist for Every Stage
- Permits, Inspections, and Code Compliance
- Materials, Substitutions, and Workmanship Standards
- Closeout, Warranty, and Long-Term Durability
- Frequently Asked Questions
Why Quality Control Decides Whether Your Home Remodeling Pays Off
Quality control is the planned process of inspecting work, materials, and installations at defined stages of a project so defects get caught before they get buried.
The stakes go beyond money. Poor workmanship in critical systems like plumbing, electrical, and HVAC can create leaks, damage, and safety hazards that surface months after the final walkthrough.
Here's the throughline for this guide: quality isn't a final inspection, it's a habit repeated at every phase.
How to Choose a Remodeling Contractor You Can Actually Trust
Trust starts with verification, not vibes. The right contractor is licensed where required, insured, and able to show you completed work you can visit or call about.
A common mistake is hiring on price alone. The lowest bid often reflects skipped permits, thin insurance, or crews who disappear mid-project. Ask every candidate the same questions and compare answers side by side.
Verify Credentials, Insurance, and Past Work
Check licensing through your state or local licensing board, and confirm the policy is current by requesting a certificate of insurance directly from the insurer, not just a photocopy from the contractor. Ask for references from projects finished in the last year and call them.
For a deeper walkthrough of vetting and selection, see our hiring guide for remodeling contractor services.
The Home Remodeling Contract Checklist That Prevents Disputes
A written contract is your project's rulebook. If it isn't written down, it doesn't exist, and disputes almost always trace back to something the contract left vague.
Use this home remodeling contract checklist before you sign:
- Scope of work with specific materials, brands, and quantities
- Total price, payment schedule, and what triggers each payment
- Start date, substantial completion date, and weather or delay clauses
Have an attorney review anything above your comfort level. For practical steps on keeping communication clear and documented, see how to manage contractor communication. The consumer guidance from the Federal Trade Commission on home improvement contracts covers your rights around written agreements and cancellation.
Change Orders and Payment Milestones
Change orders are where budgets quietly blow up. Require every change in writing with a price and schedule impact before work proceeds, and tie payments to completed milestones rather than calendar dates. Our guide to avoiding remodeling budget surprises digs into protecting your budget through the change-order process.
Your Home Renovation Timeline, Phase by Phase
A realistic home renovation timeline runs from design and permitting through rough-in, finishes, and closeout, and each phase has its own quality gate.
| Phase | Typical Duration | What Happens | Quality Gate |
|---|---|---|---|
| Planning and design | 2-6 weeks | Scope, drawings, budget, permit applications | Signed plans, approved permits, material selections locked |
| Demolition | 1-3 days | Tear-out, site protection, dumpster placement | Structural review before rebuild; hazardous materials (lead, asbestos) abated per EPA rules |
| Rough-in | 1-3 weeks | Framing, plumbing, electrical, HVAC | Municipal inspections pass before walls close; photographs of every wall cavity |
| Insulation and drywall | 1-2 weeks | Insulation, hang, tape, texture | Insulation R-value verified against spec; drywall flat and plumb |
| Finishes | 2-6 weeks | Tile, cabinetry, paint, fixtures, trim | Level, square, sealed, and lippage-free checks; fixture operation tested |
| Closeout | 1-2 weeks | Punch list, final walkthrough, warranty handoff | Signed completion, lien waivers collected, as-built drawings delivered |
Build in buffer time. Material lead times and inspection scheduling are the usual culprits behind delays, so confirm delivery dates before demolition begins. A common pattern is a two-week buffer for custom cabinetry and a one-week buffer for inspection scheduling; adjust based on your jurisdiction's turnaround times.
Scheduling Mechanics That Keep the Timeline Honest
A timeline is only useful if it ties to triggers, not just dates. Use these mechanisms:
- Inspection-driven sequencing: Rough-in inspections must pass before insulation and drywall. Schedule the inspection as soon as rough-in is complete, and do not let the crew proceed until the sign-off is in hand. In many jurisdictions, the inspector's window is 24-72 hours, so plan around it.
- Material delivery milestones: Confirm lead times in writing from your contractor. Cabinets, windows, and specialty tile often run 4-12 weeks. If a delivery slips, the finish phase compresses, which is where quality suffers.
- Weather and cure times: Concrete, stucco, and paint have temperature and cure requirements. A schedule that ignores them invites callbacks.
For a full stage-by-stage quality tool that pairs with this timeline, use our checklist for avoiding poor quality home renovation.
A Home Remodeling Quality Checklist for Every Stage
A home remodeling quality checklist is a written set of pass/fail checks tied to each phase, reviewed with your contractor before work moves forward. The key is catching problems while they're still cheap to fix.
Rough-In, Mid-Project, and Final Walkthrough Checks
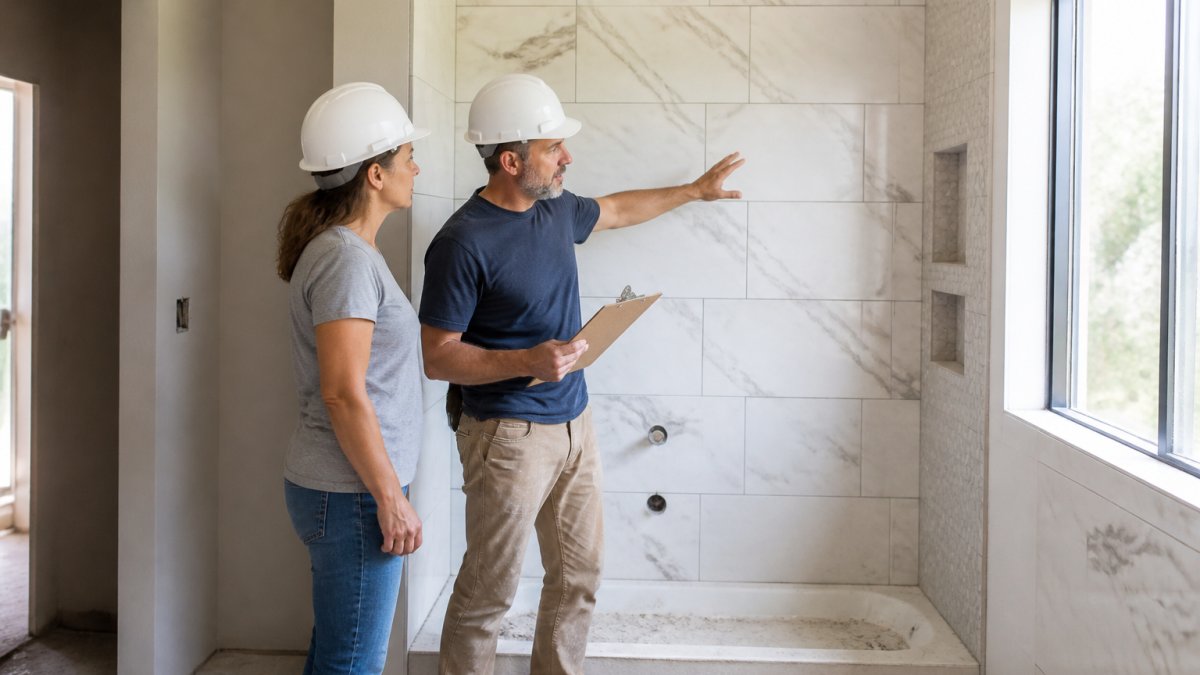
Run three checkpoints. At rough-in, confirm framing is straight and plumb, plumbing and electrical are correctly routed, and inspections pass before drywall. Mid-project, check tile is level and lippage-free, joints are aligned, and waterproofing is intact. At the final walkthrough, test every fixture, outlet, door, and drain, and confirm the punch list is complete in writing.
For a full stage-by-stage tool, use our checklist for avoiding poor quality home renovation.
Permits, Inspections, and Code Compliance
Permits and inspections are your independent quality guarantee, but only if you verify them rather than assume. Building codes set minimum safety standards, and a municipal inspector verifies the work meets them at defined stages. Regulatory compliance is not red tape, it is a second set of eyes on structural, electrical, and life-safety work that your contractor's crew may not catch.
How to Verify Permits and Inspections
Most homeowners never check whether a permit was actually pulled. Here is a step-by-step verification process:
- Confirm permit responsibility in the contract. The contract should state who pulls permits and who pays for them. In most jurisdictions, the licensed contractor pulls the permit, but the homeowner is ultimately responsible for ensuring it exists.
- Verify the permit was issued. Ask for the permit number and call your local building department to confirm it is active and matches the scope of work. Some departments offer online permit lookup.
- Know which inspections apply. Common inspections include foundation, framing, rough-in (plumbing, electrical, HVAC), insulation, and final. Ask your building department for the inspection sequence for your project type.
- Attend inspections when possible. You do not need to be present, but attending the rough-in and final inspections lets you hear the inspector's findings directly.
- Collect every sign-off. Keep copies of inspection reports and the final certificate of occupancy or completion. These documents matter at resale and for insurance claims.
Independent Inspections Beyond the Municipal Check
Municipal inspections verify code minimums, not workmanship quality. For high-stakes systems, consider hiring an independent inspector:
- Pre-drywall inspection: A licensed home inspector or structural engineer can review framing, plumbing, and electrical routing before walls close. This catches issues municipal inspectors may miss because they focus on code compliance, not long-term durability.
- Waterproofing inspection: In bathrooms and wet areas, a third-party waterproofing inspection before tile installation is cheap insurance against hidden moisture damage.
- Final walkthrough inspection: An independent inspector can generate a punch list that you can compare against the contractor's list.
Independent inspections typically cost a few hundred dollars and can be scheduled alongside municipal inspections. Ask your contractor whether they have worked with independent inspectors before, a resistant contractor is a warning sign.
Code Compliance and Older Homes
Older homes often trigger code upgrades when remodeling. Common triggers include electrical panel upgrades, GFCI protection in kitchens and baths, handrail heights, and egress window requirements for bedrooms. Ask your building department which upgrades apply to your scope, and get them into the contract before work begins.
For a deeper walkthrough of vetting and selection, see our hiring guide for remodeling contractor services.
Materials, Substitutions, and Workmanship Standards
Specify materials in writing, down to brand and model, so substitutions can't happen quietly. When a product is discontinued or backordered, require written approval before any swap, and compare the substitute's specifications rather than accepting a verbal assurance.
Workmanship standards should be spelled out too: grout line width, tile pattern, paint sheen, and trim details. For current pricing context when judging value on substitutions, see our residential construction project pricing guide.
Closeout, Warranty, and Long-Term Durability
Closeout is where a project becomes a home again, and it deserves the same rigor as the first day. Collect as-built drawings, warranty documents, permit sign-offs, and a maintenance schedule for HVAC filters, caulk lines, and exterior seals.
Durability lives in maintenance. Small leaks and worn caulk become structural problems when ignored, so schedule seasonal checks of critical systems. A proper closeout package is the difference between a renovation that holds up and one that starts failing the moment the crew leaves.
Frequently Asked Questions
How do you ensure quality control during a home remodeling project?
Set quality checkpoints before work starts: a written scope, a home remodeling quality checklist tied to each phase, and scheduled walkthroughs at rough-in, mid-project, and final completion. Confirm that licensed trades handle electrical, plumbing, and HVAC, and that permits are pulled where required. Photograph progress weekly, compare installed materials against the approved specifications, and hold the final payment until punch-list items are corrected. Constant communication with your contractor keeps small defects from becoming expensive rework.
What should a home remodeling contract include?
A solid contract names the contractor's license number, insurance coverage, and the full scope of work with material specifications and product model numbers. It should state the payment schedule tied to milestones, the home renovation timeline with start and completion dates, a change-order process with written approval, warranty terms, and a dispute-resolution clause. Include who pulls permits, who handles cleanup and site security, and how the work area stays separated from building occupants. Have an attorney review anything above routine scope.
How often should homeowners communicate with their remodeling contractor?
Weekly is the practical baseline, with a short check-in at each phase transition. Ask for a standing day and time, plus a written summary of what was completed and what comes next. On active construction days, a quick text about deliveries or inspections keeps surprises low. If a contractor goes quiet for more than a few days without explanation, treat it as a warning sign and request a status update in writing. Clear, constant communication is the cheapest quality control you have.
What should you inspect before making the final payment?
Walk the project against the written scope and your home remodeling quality checklist. Check tile alignment and grout lines, door and cabinet operation, paint coverage, caulk and sealant at wet areas, and that all fixtures work. Confirm final inspections passed and permits are closed out. Verify the punch list is complete in writing, collect warranty documents and manufacturer paperwork, and get lien waivers from subcontractors. Hold a retainage amount until every item is signed off.
How can you spot signs of structural damage during a remodel?
Watch for new cracks in drywall near corners and door frames, doors or windows that suddenly stick, uneven or bouncy floors, and water staining around ceilings and exterior walls. During demolition, a contractor should stop and flag rot, compromised framing, or missing headers rather than covering them up. Structural repairs need engineering review and permits in most jurisdictions, so treat any discovered damage as a change order with documented scope before work continues.
What are the main stages of a home remodeling project?
Most projects move through design and planning, permitting, demolition, rough-in for electrical, plumbing, and HVAC, insulation and drywall, finishes such as tile, cabinetry, and paint, then final inspections and closeout. Your home renovation timeline should map each stage with dates and inspection points. Expect the schedule to shift when hidden damage or material delays appear; a written change process keeps those shifts visible instead of letting them silently push the completion date.
A remodel only pays off when the quality holds up after the last invoice is paid. JB's Construction LLC brings clear, constant communication and careful craftsmanship to every phase, from custom tile work and bathroom additions to structural rebuilds, and we offer free estimates so you can plan with confidence. Get a free estimate from JB's Construction LLC and start your project with a team that stays with you until the job is done right.